
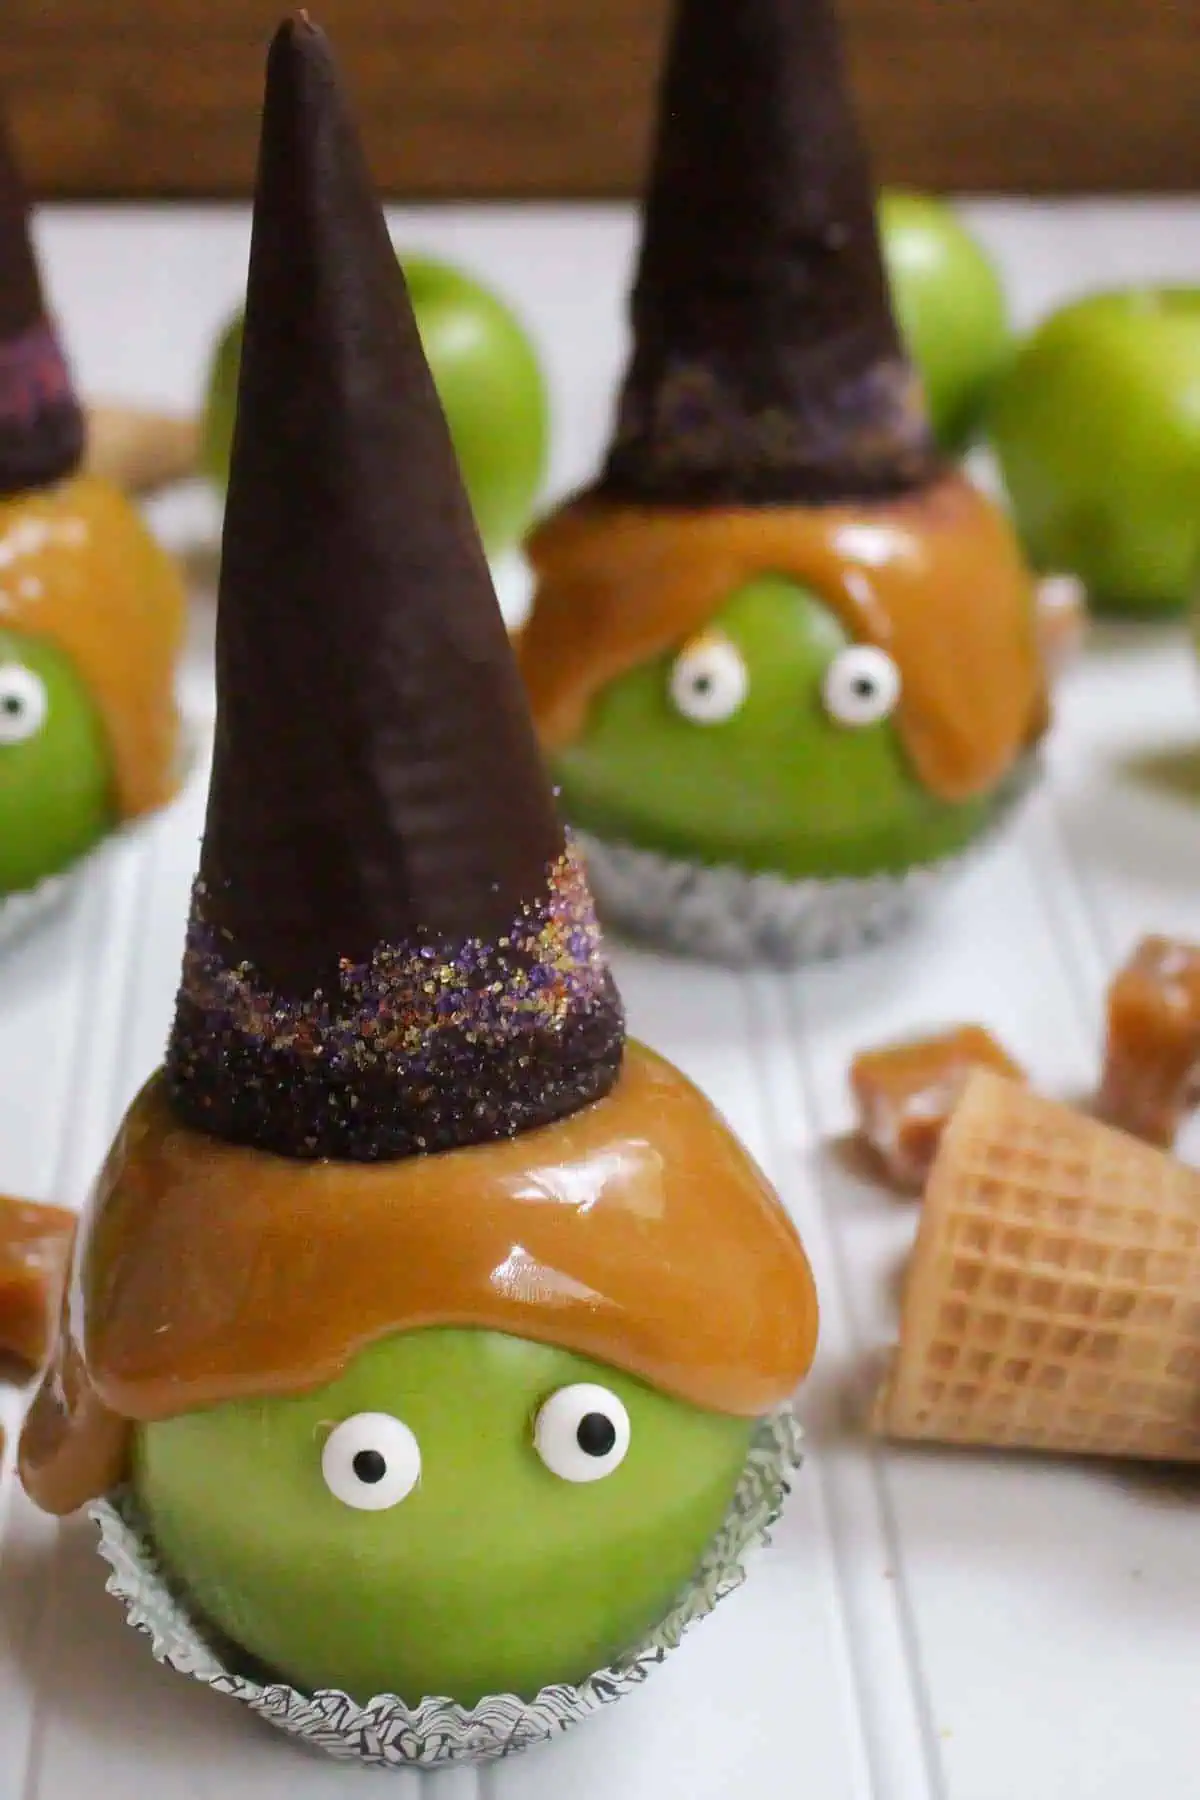
When Halloween rolls around, sometimes I enjoy fun treats that double as an afternoon activity rather than stressful baking projects. You do not need candy thermometers, wooden skewers, or tricky equipment to make these cute Halloween centerpieces. These witch caramel apples are an easy edible craft you can make with kids, set out at a party, or build together as an interactive decorating station.
I‘m going to keep it real witch ya, they were a lot easier to make than I expected. If the co-anchors on FOX59 laugh while making these on air, I have no doubt your friends or kids would have a blast creating them too!
If you are looking for another showstopper Halloween centerpiece, check out my Zombie Brownie Cake. For another really simple, Halloween appetizer for your party try my delicious, fun Graveyard Taco Dip!
What Goes into These Witch Caramel Apples?
I kept the ingredient list short and accessible:
- Granny Smith Apples: Tart, crisp green apples provide the best contrast to caramel and chocolate. Plus, their sturdy shape gives our witch hats a solid base.
- Store-Bought Soft Caramels: I wanted to keep this as easy as possible. Caramel sauce made by microwaving caramel candies and heavy cream is faster and simpler than making homemade caramel.
- Chocolate Chips & Shortening: Melting chocolate chips with shortening thins the chocolate just enough to coat the cones smoothly and gives the hats a glossy finish. Plus the shortening will keep the chocolate from hardening too quickly when you cover the cones.
- Sugar Cones: Standard ice cream sugar cones make the perfect witch hats. Plus the flavor pairs nicely with the caramel apple.
- Cupcake Liners: Placing each apple inside a cupcake liner keeps the caramel contained, catches stray sprinkles, and lets little hands pick them up cleanly.
- Candy Eyes: These are readily available in grocery stores at this time of year.
- Halloween Sprinkles: Choose whatever spooky colors you want to form the hat brim.

How to Easily Make the Chocolate Witch Hats
Transforming plain sugar cones into miniature witch hats is half the fun of this activity.
Melt and Smooth the Chocolate
Use a microwave-safe bowl and melt the chocolate chips and shortening in the microwave, heating and stirring in 30-second intervals until smooth, about 2-3 minutes total. Use a spoon to cover the sugar cones with the melted chocolate, using the back of the spoon to smooth the chocolate out evenly.
Create the Hat Brim with Sprinkles
Sprinkles around the base of the cone serve as the brim of the hat. The easiest way to do this is to dip melted chocolate rim directly in a shallow dish of sprinkles. Set the finished cones aside on a piece of waxed or parchment paper until completely cooled and set.
Get the Caramel to Stick to Store-Bought Apples
Grocery store apples are coated in food-grade wax to keep them shiny and fresh, which creates a slick surface that caramel struggles to grip. Here are my tricks to getting caramel to stick:
- Remove the Wax: Dip or run your apples in warm (but not boiling) water for 10-15 seconds, then scrub them vigorously with a clean kitchen towel. You should feel the waxy barrier disappear. I like to remove the stems of the apples as well.
- Dry Thoroughly: Moisture also will limit caramel’s ability to stick. Make sure the apples are completely dry before adding any topping.
- Chill Before Drizzling: Place your cleaned, dried apples into the refrigerator for 15-20 minutes before adding the caramel. The chilled apple speeds up the caramel cooling, setting quickly instead of running off.
Final Assembly & Halloween Party Serving
Assembling the Caramel Apples – No Skewers Necessary
Skipping wooden skewers and lollipop sticks makes this project safer for younger kids and far more relaxed to assemble.
Place a clean apple upright inside a cupcake liner. Spoon your warm melted caramel over the crown of the apple so it drips a little down the sides. While the caramel is still warm and tacky, gently press your chocolate witch hat right on top. The caramel acts as a glue, locking the hat in place as it cools.
Adding the Candy Eyes
I just use my finger to dab a little caramel onto the apple and then use that to “glue” a candy eye to the apple.
How to Serve at a Party
These make really fun decorations for a table. That doesn’t mean you can’t still enjoy them as an edible treat as well!
The best way to enjoy them is in two stages:
- I take the hat off and slice the apples into wedges.
- I either add the apple to the cone or crumble the hat over the wedges and eat them together.

As Seen on TV
I made this recipe on air with Fox59!
Print
Witchy Caramel Apples
Turn Granny Smith apples and sugar cones into adorable witch caramel apples! A fun, no-stress edible Halloween craft perfect for parties.
- Total Time20 minutes
- Yield6 witch caramel apples 1x
- DietVegetarian
Ingredients
- 12 oz chocolate chips
- 1 tbsp shortening
- 6 sugar cones
- Sprinkles
- 6 large granny smith apples
- 8 oz unwrapped soft caramels
- 2 tbsp heavy cream
- 12 candy eyes
Instructions
- Prepare the apples: Remove the stems. Wash the apples under warm water and scrub thoroughly with a clean kitchen towel to remove the wax coating. Dry completely. I recommend chilling these in the refrigerator prior to using them for the recipe.
- Prepare the chocolate: Combine chocolate chips and shortening in a microwave-safe bowl. Microwave in 30-second increments, stirring between each, until completely melted and smooth. This will take around 2-3 minutes total.
- Coat the cones: Hold a sugar cone by its base and spoon the melted chocolate along the cone, smoothing it with the back of the spoon. Press or roll festive sprinkles along the wide base of the cone to create the hat brim. Place the cones on waxed paper to cool. Do this step first before prepping the apples to give the chocolate a chance to fully set. It only takes about 5-10 minutes at room temperature to fully set.
- Make the caramel: Microwave the caramels and heavy cream in a medium microwave-safe bowl in 30-second intervals, stirring each time, until melted. Make sure it’s still a little thick because we don’t want it to slide right off the apple.
- Add the caramel: Spoon the warm caramel over the top of each apple, letting it drizzle naturally down the sides.
- Add the eyes: Use your finger to apply a dab of caramel to the apple and then “glue” the candy eyes to the apple.
- Set the hat: While the caramel is still warm and tacky, set a chocolate witch hat firmly on top of each apple.
- Place in refrigerator (optional): Place the finished witch caramel apple in the refrigerator to help it set in place.
- Prep Time: 10 minutes
- Setting Time: 5 minutes
- Cook Time: 5 minutes
- Category: Appetizer, Dessert
- Cuisine: American
Nutrition
- Serving Size: 1 witch caramel apple
- Calories: 500
- Sodium: 200 mg
- Fat: 18 g
- Carbohydrates: 80 g
- Fiber: 7 g
- Protein: 4 g