
This is a sponsored post by Challenge, but the text and opinions are all mine. Thank you for supporting brands that make Kylee’s Kitchen possible!
These s’mores bars may very well be the easiest dessert I’ve ever made. The graham cracker crust requires one bowl and a spoon for mixing; everything else gets layered in an 8-inch square pan.
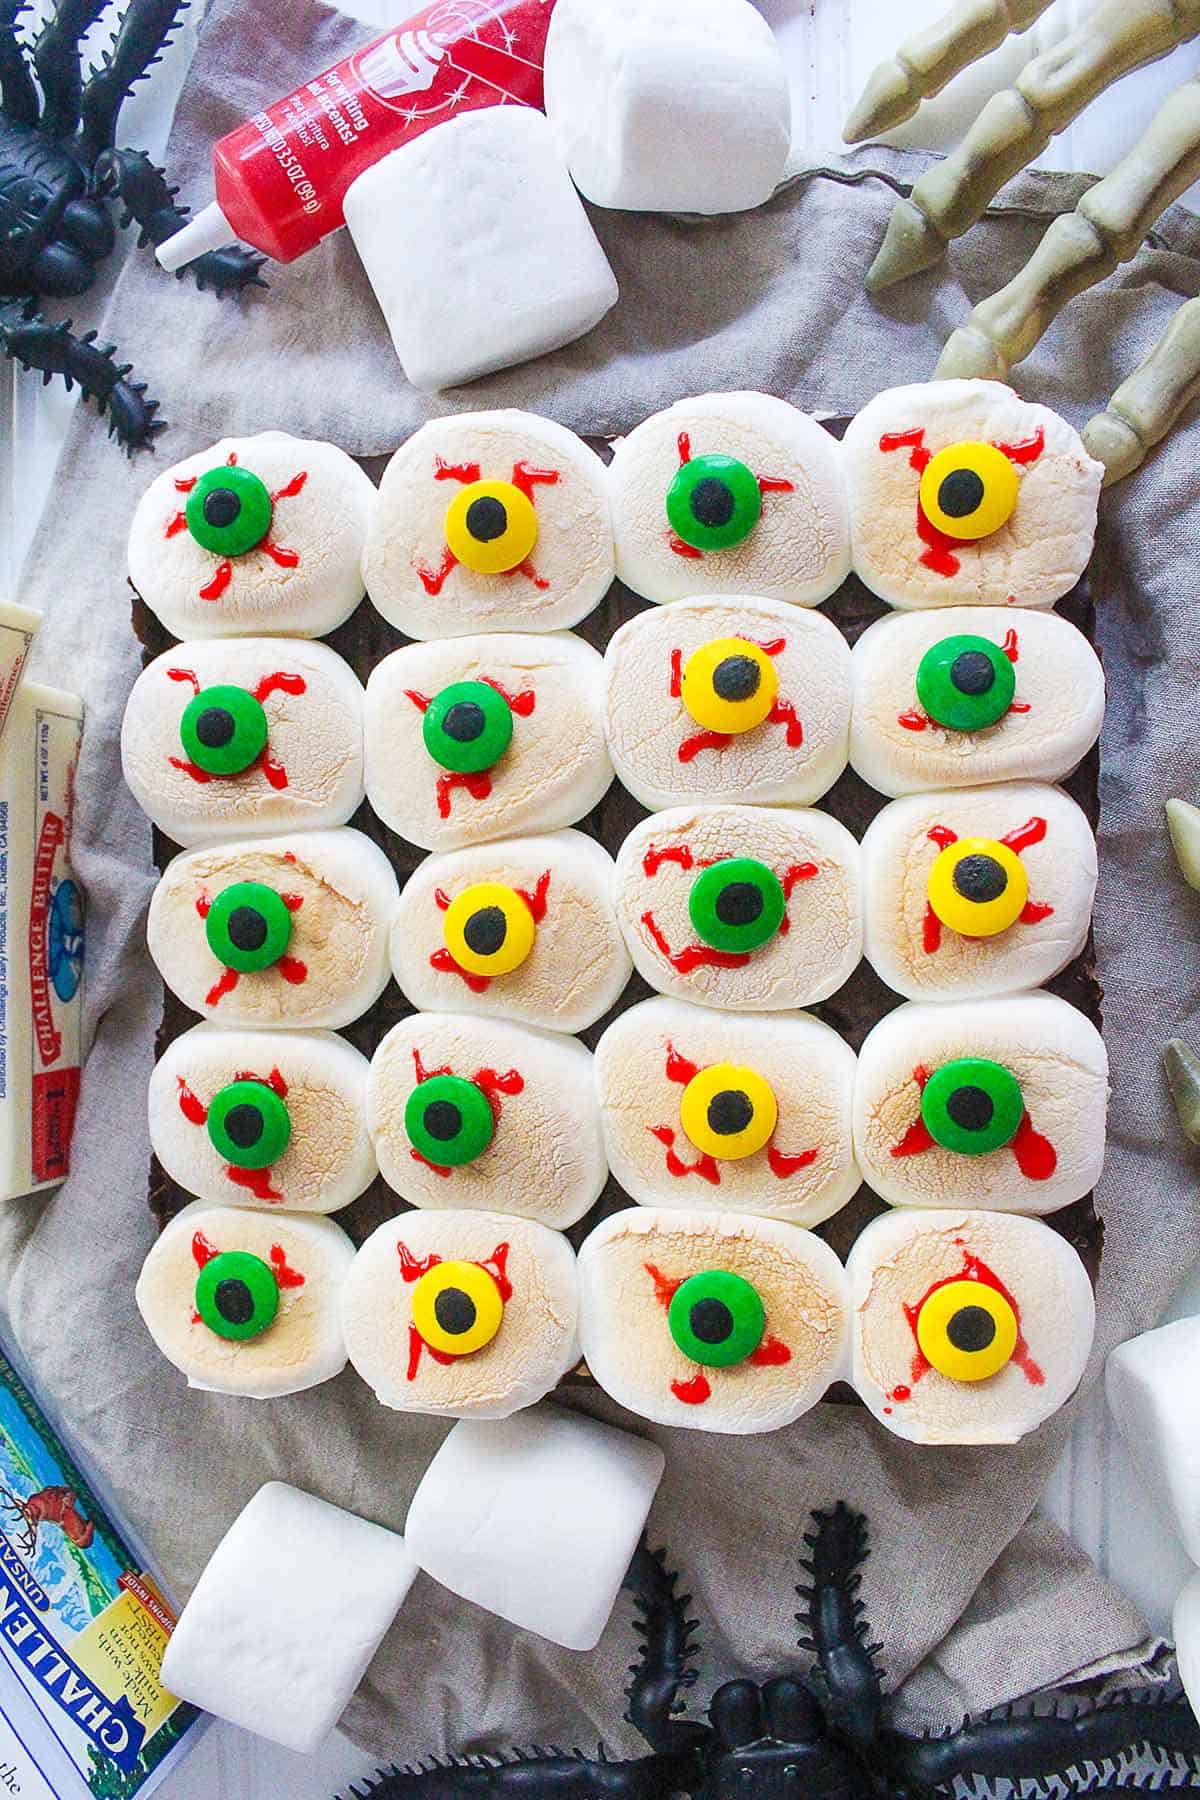
I’m not sure what made me think to turn marshmallows into bloodshot eyes, but I guess that’s where my mind is right now. S’mores bars are a delicious dessert all year round, but it was especially fun for me to adapt them for Halloween. This easy Halloween s’mores bars recipe brings the spooky while retaining the campfire flavor without any open flames. It’s perfect for a Halloween party or just to share with your family.

What Goes into Halloween S’mores Bars?
These bars come together with pantry staples. Each layer plays an important role in preserving the gooeyness of a campfire s’more after being formed into an individual bar:
- Melted Unsalted Butter: Because this recipe has so few ingredients, it’s important to make sure everything you use is of the best quality. I used Challenge butter because they use fresh, hormone-free milk, and they don’t add any unnatural additives. Melting the butter keeps the graham cracker crust soft instead of dry and crumbly.
- Brown Sugar & Vanilla: Adds subtle caramel note that complements the honey-graham flavor.
- Graham Cracker Crumbs & Flour: Provides that authentic s’mores flavor with enough flour structure so the bars hold together when sliced.
- King-Size Chocolate Bars: Two 7-ounce chocolate bars fit across an 8-inch pan. Milk chocolate gives a classic, nostalgic s’mores flavor, but dark chocolate creates a less sweet, more chocolatey flavor to balance the marshmallow topping.
- Marshmallows: Standard regular-sized marshmallows work great to fit the pan grid, or you can cut 10 jumbo marshmallows in half with kitchen shears.
- Candy Eyeballs & Red Decorating Gel: The simple decorations that transform the s’mores bars into spooky Halloween eyeball treats.
How to Decorate Marshmallow Eyeballs for Halloween
Turning ordinary marshmallows into creepy bloodshot eyes is easy and requires no artistic skills. In fact, imperfect squiggles actually look creepier!
Getting the Marshmallows Golden: Low-Broil Oven Setting
The secret to toasting the marshmallow layer indoors is using your oven’s broiler on low. Slide the pan onto the middle rack, turn the oven light on, and do not walk away. As soon as the tops turn golden and puffed (about 1 to 2 minutes), pull them out immediately.
Squiggly Bloodshot Lines & Candy Eyes
Let the bars cool for about 10 to 15 minutes before decorating so the icing doesn’t melt. I used Wilton Red Sparkle Gel to create the squiggly bloodshot lines, and then I stuck colored candy eyeballs on top. If you can’t find the gel, use any type of red icing.
You can find candy eyeballs in the baking section of most grocery stores this time of year, but if you have issues finding them, use an M&M or a Spree and draw a little black pupil on the candy with an edible marker.
My Tips for Easy Cutting
Melted chocolate and toasted marshmallow can be difficult to work with and slice. These two simple steps help guarantee precise squares every time:
The Aluminum Foid Sling
Butter your 8×8-inch baking pan, then line it with aluminum foil, leaving 1 to 2 inches of overhang on opposite sides. Butter the top of the aluminum foil too. Once the bars are cool and the icing is set, use the foil handles to lift the entire block straight out onto a cutting board.
In my original recipe, I used parchment paper, which worked well but is at risk of burning/catching on fire under the broiler. I changed to aluminum foil, which works just as well without the risk of burning. I do not recommend using parchment paper for the sling.
Slicing
Cut your squares along the marshmallows to avoid cutting the marshmallows themselves and making a gooey mess. If need be wipe your knife between cuts.
How to Prep Halloween S’mores Bars Ahead of Time
These bars are ideal for party planning because they taste just as good made in advance:
- Room Temperature Storage: Store cooled, decorated bars in a single layer inside an airtight container at room temperature for up to 3 days.
- Skip the Refrigerator: Do not store these in the fridge. Chilling is not needed and can ruin the gooey texture of the toasted marshmallows.
- How to Transport: If you need to transport them to a Halloween party, make sure to avoid stacking the bars directly on top of each other.
Looking for more spooky inspiration? Check out all of my Halloween recipes! Personally, I think these would work well on a dessert platter with my Bloody Shattered Glass Cupcakes and Monster Sandwich Cookies.
As Seen on TV
I made this recipe on Fox59!

Halloween S’mores Bars (Bloodshot Eyeball Treats)
Easy one-bowl Halloween s’mores bars with a graham cracker crust, melted chocolate bars and toasted marshmallow bloodshot eyeballs.
- Total Time27 minutes
- Yield20 bars 1x
Ingredients
- 1/2 cup (1 stick) unsalted butter, melted
- 3/4 cup (150 g) brown sugar
- 1 egg
- 1 tsp vanilla extract
- 1 1/4 cup (150 g) all-purpose flour
- 1 cup (100 g) graham cracker crumbs
- 1 tsp baking powder
- 1/2 tsp salt
- 2 king size chocolate bars (milk or dark chocolate, 7 oz each)
- 20 marshmallows or 10 jumbo marshmallows cut in half
- Wilton Red Sparkle Gel or other cookie icing
- Candy eyes
Instructions
- Preheat and prep: Preheat oven to 350 degrees Fahrenheit. Butter an 8 x 8-inch baking pan and line with aluminum foil, leaving overhang on the sides. Lightly butter the aluminum foil.
- Make the crust: In a medium bowl, mix melted butter with brown sugar, egg, and vanilla extract. Stir in flour, graham cracker crumbs, baking powder, and salt until a soft dough forms.
- Bake the base: Spread dough evenly into prepared pan and smooth the top. Bake for 18 to 20 minutes on the middle rack.
- Melt the chocolate: Remove pan from oven and cover the top evenly with chocolate bars. Return to oven for 1 to 2 minutes, or just until the chocolate just starts to melt.
- Toast marshmallows: Remove from oven and arrange marshmallows in rows on top of the chocolate. Switch oven to LOW BROIL. Return pan to oven for 1 to 2 minutes until marshmallows are puffed and golden brown. Watch carefully so they do not burn!
- Cool and decorate: Remove from oven and let cool for 15 minutes. Pipe red gel in squiggly lines radiating from the center of each marshmallow to resemble bloodshot veins. Gently press a candy eye onto the center of each marshmallow.
- Slice and serve: Allow icing to set completely before using the aluminum foil overhang to lift bars from the pan. Cut into squares and serve.
- Prep Time: 5 minutes
- Cook Time: 22 minutes
- Category: Dessert
- Method: Baking
- Cuisine: American
Nutrition
- Serving Size: 1 bar
- Calories: 250
- Sugar: 25 g
- Sodium: 130 mg
- Fat: 11 g
- Saturated Fat: 6 g
- Carbohydrates: 35 g
- Fiber: 1 g
- Protein: 3 g
- Cholesterol: 20 mg